NOVEMBER CHALLENGE 🖤
Bonjour my little demon, ready to collect gem #28?
Whether you just joined or have been here from the beginning, thank you so much for reading.
TODAY'S GEM
Yesterday, I shared the story behind my shortcut to mastering fantastical stylized portraits.
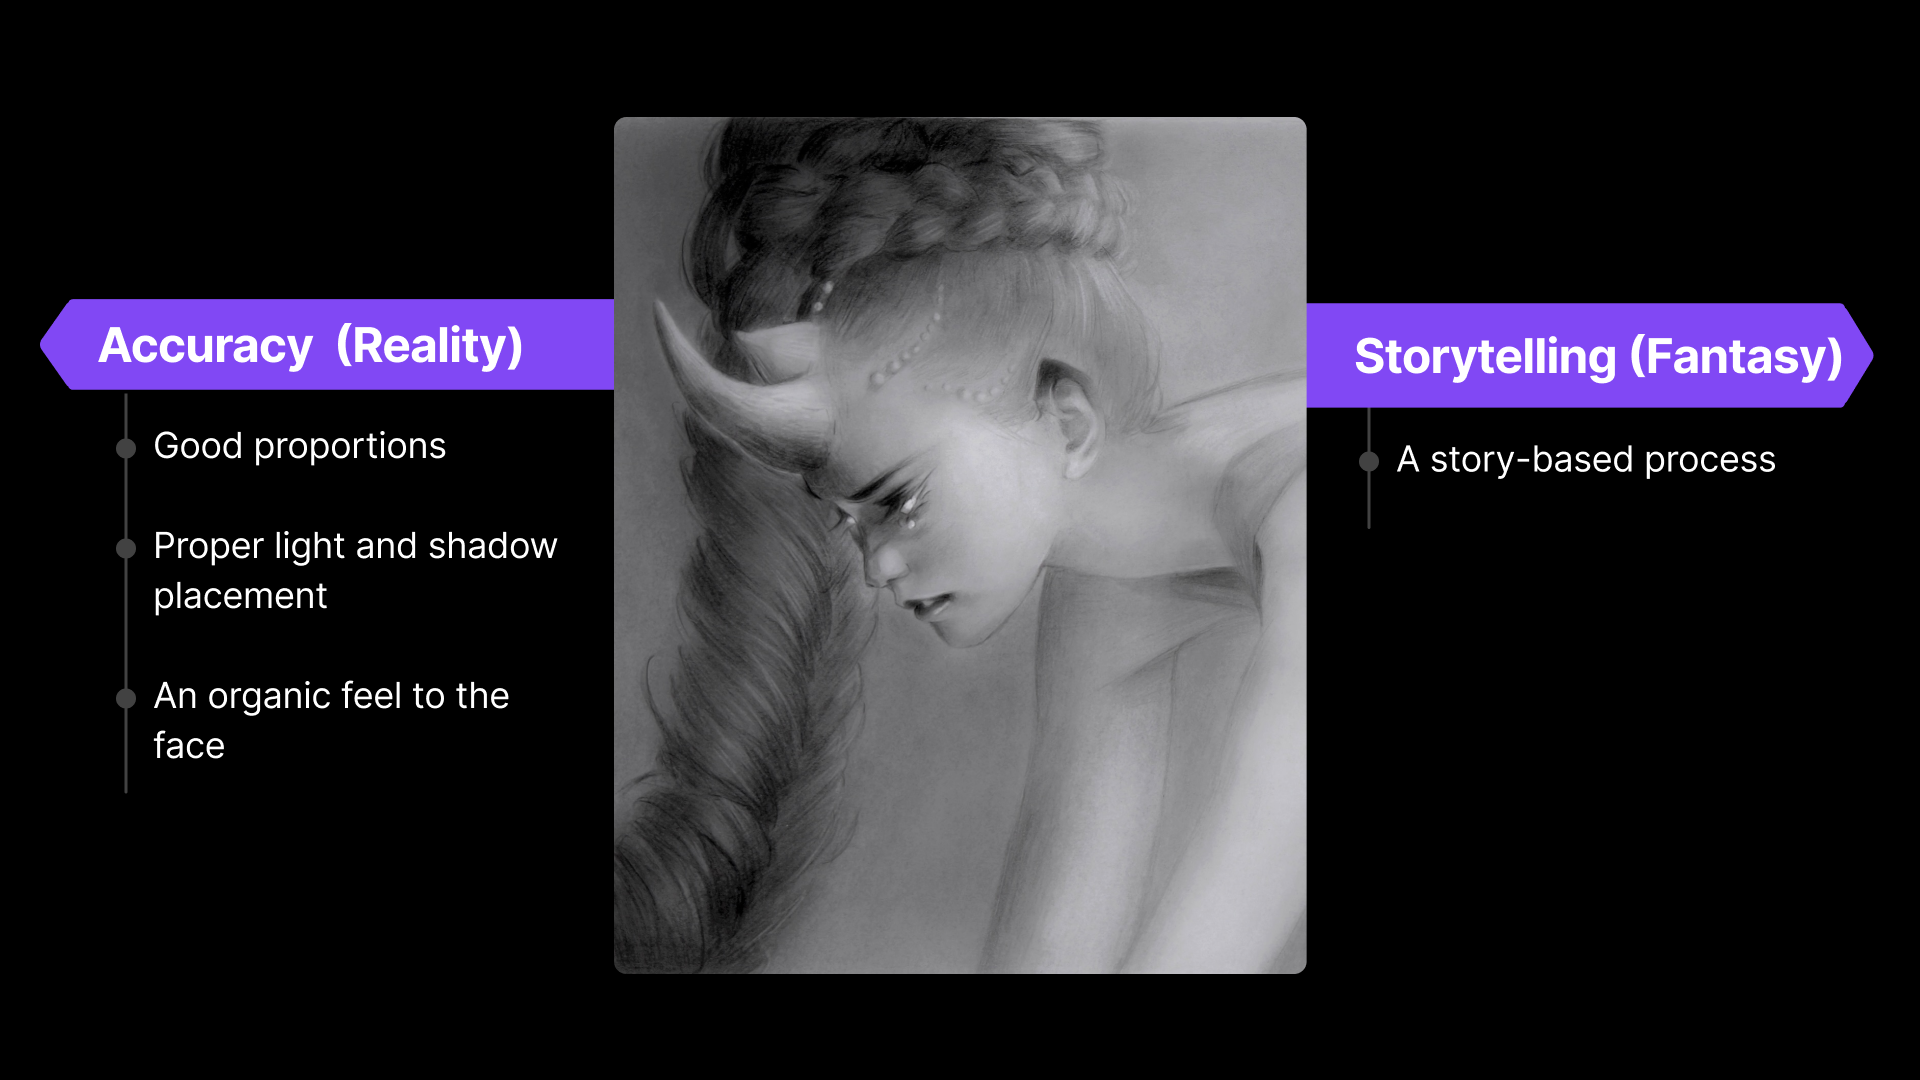
I call this streamlined method Reality to Fantasy, and over 550 students have already tested it.
In today’s portrait gem, I’ll break down its 4 keys so you can cheat your way to creating unforgettable stylized portraits, using just a pencil and some paper.
At the end of the email, I’ll share one last step to set you up for portrait success.
Be ready to take notes and let’s dive in! 🔥
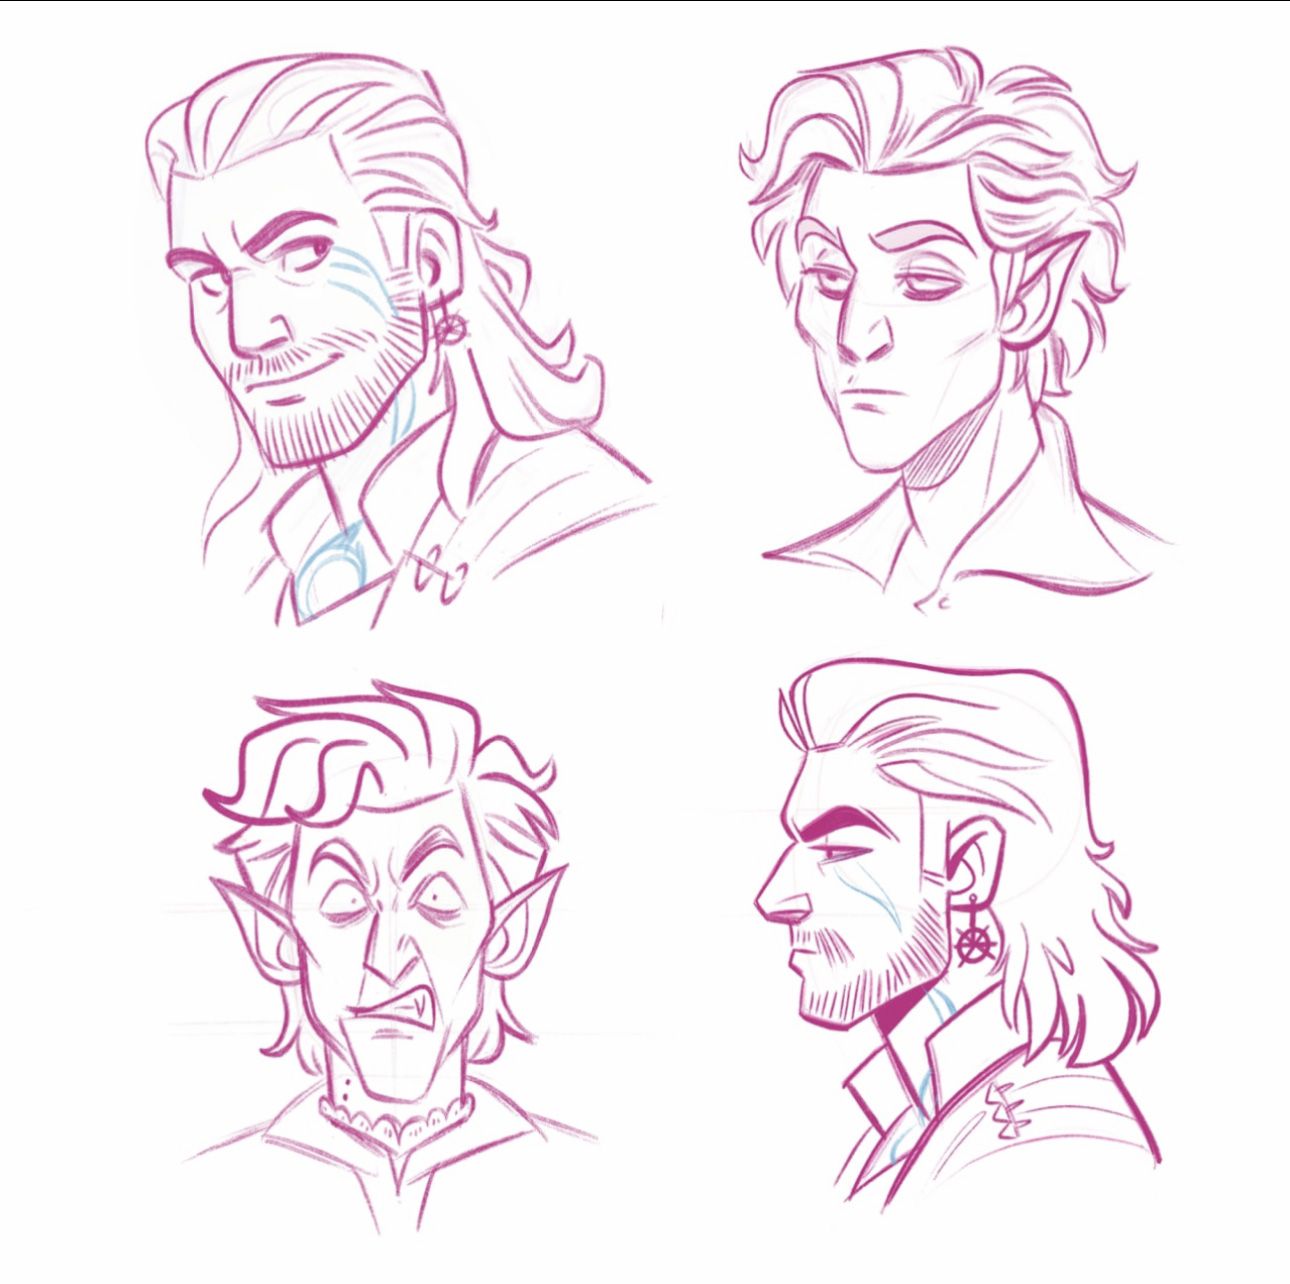
STEP 1: [Reality] Drawing the head in any position
Before I could draw my favorite characters, I realized I needed to (really) master the foundation of every portrait.
The base that supports your shading, your style, and your storytelling.
The head.
The challenge? sketching the head is harder than it looks. It is a highly complex structure, and many artists spend years trying to master it.
But hopefully, if you work smart, you can learn it fast.
1- Simplify the head.
Here’s the paradox: the secret to drawing accurate heads isn’t in complex theories like the Loomis method or Asaro’s planes.
The real shortcut is to simplify the head to its most basic form.
By removing unnecessary details, you’ll:
- Learn Better: You’ll focus on seeing the head as a 3D object without getting lost in complexity.
- Learn Faster: A simplified approach builds a strong foundation for shading, storytelling, and stylization.
2- Master the constructive stage
- Step 1: Simplify the head into its most basic form, focusing only on volume and proportion lines.

-
Step 2: Practice turning every portrait reference you see into this simplified structure. Work on heads that are turned, tilted, or in extreme perspectives to build confidence and versatility.
-
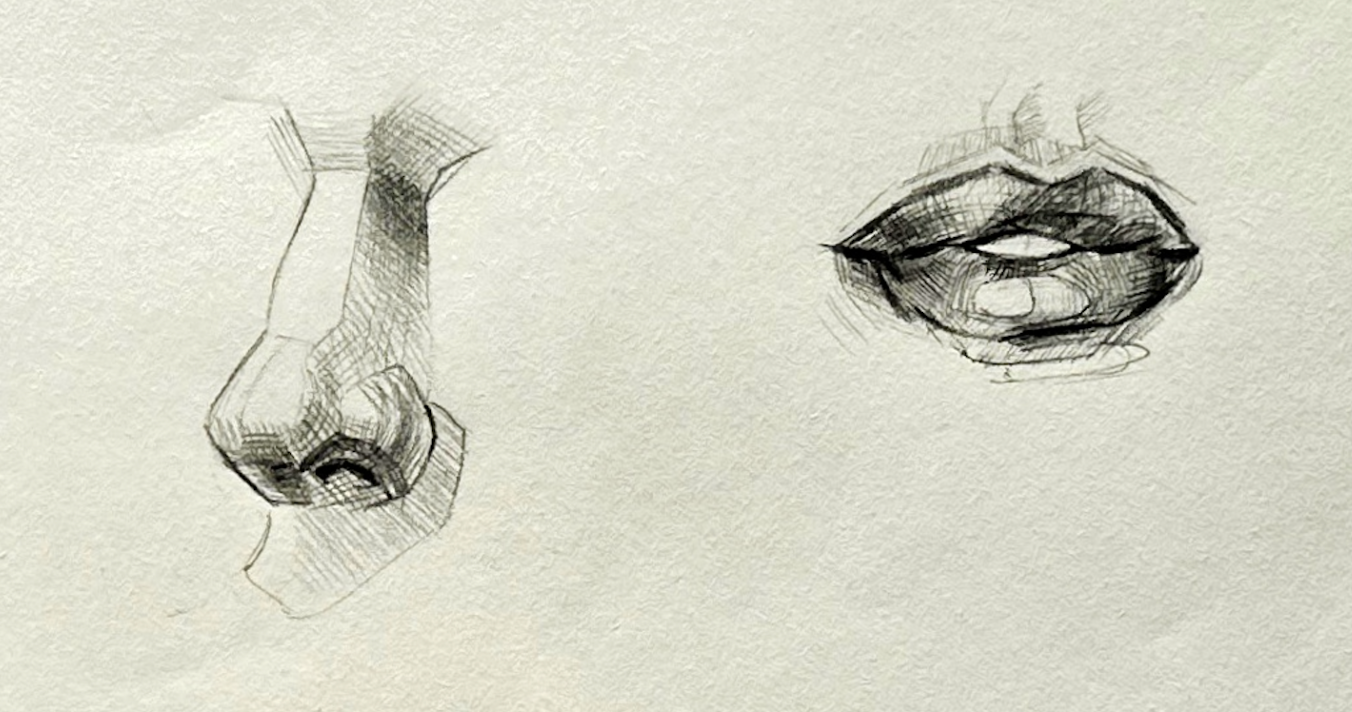
Step 3: This is where the magic happens. Once you can draw the basic head in any position, all you need to do is to learn how to draw the features and add the features on top of the simplified head.
With just a few hours of practicing Step 1, you’ll confidently sketch heads in any position. And the best part? Your unique style often starts to emerge naturally through the simplification process!
STEP 2: [Reality] Mastering shading
Now that you can confidently draw the head in any position, it’s time to bring your portraits to life.
And shading is the tool for that.
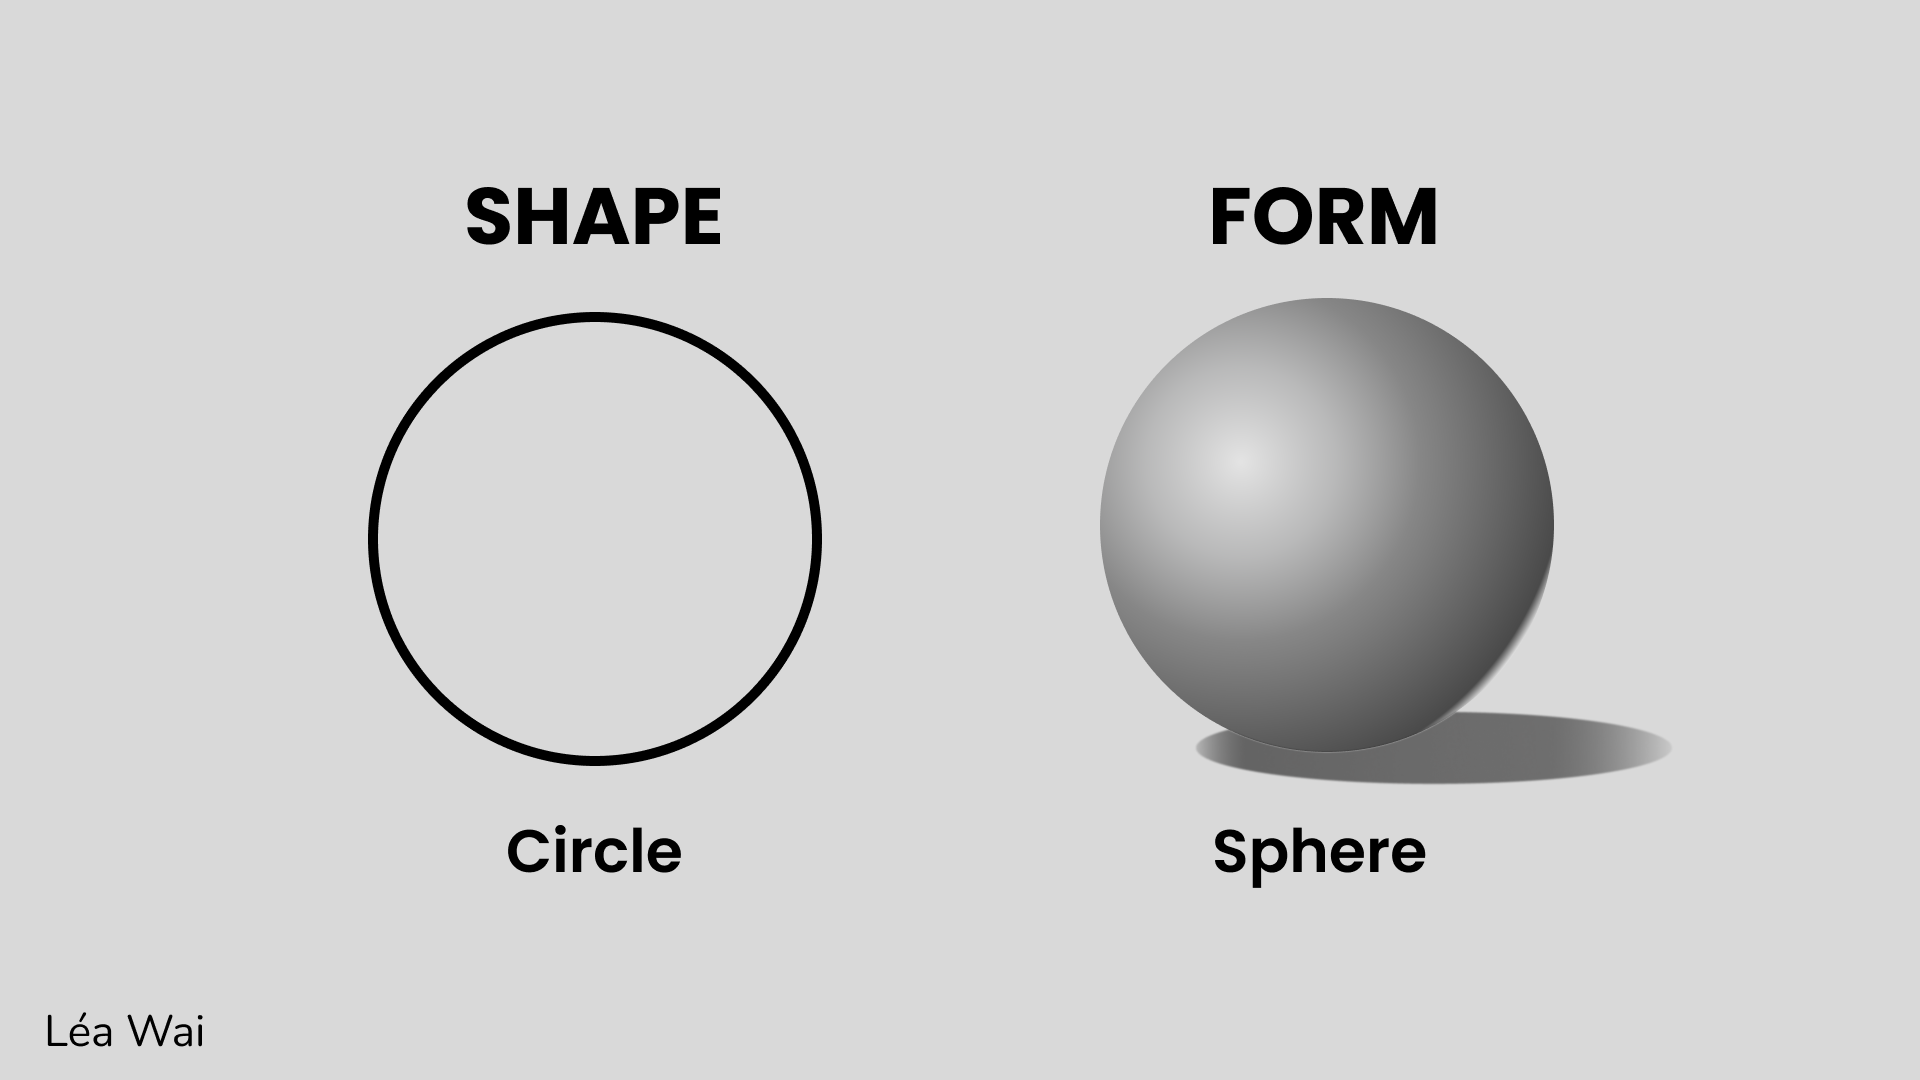
Shading essentially involves transforming a 2D shape into a 3D form:
I know, I know… Shading can feel messy and intimidating—especially if you skip the steps that actually build your skills. But let me help you work smart…
In my course "Reality to Fantasy," I've distilled a three-step process to make shading more accessible.
-
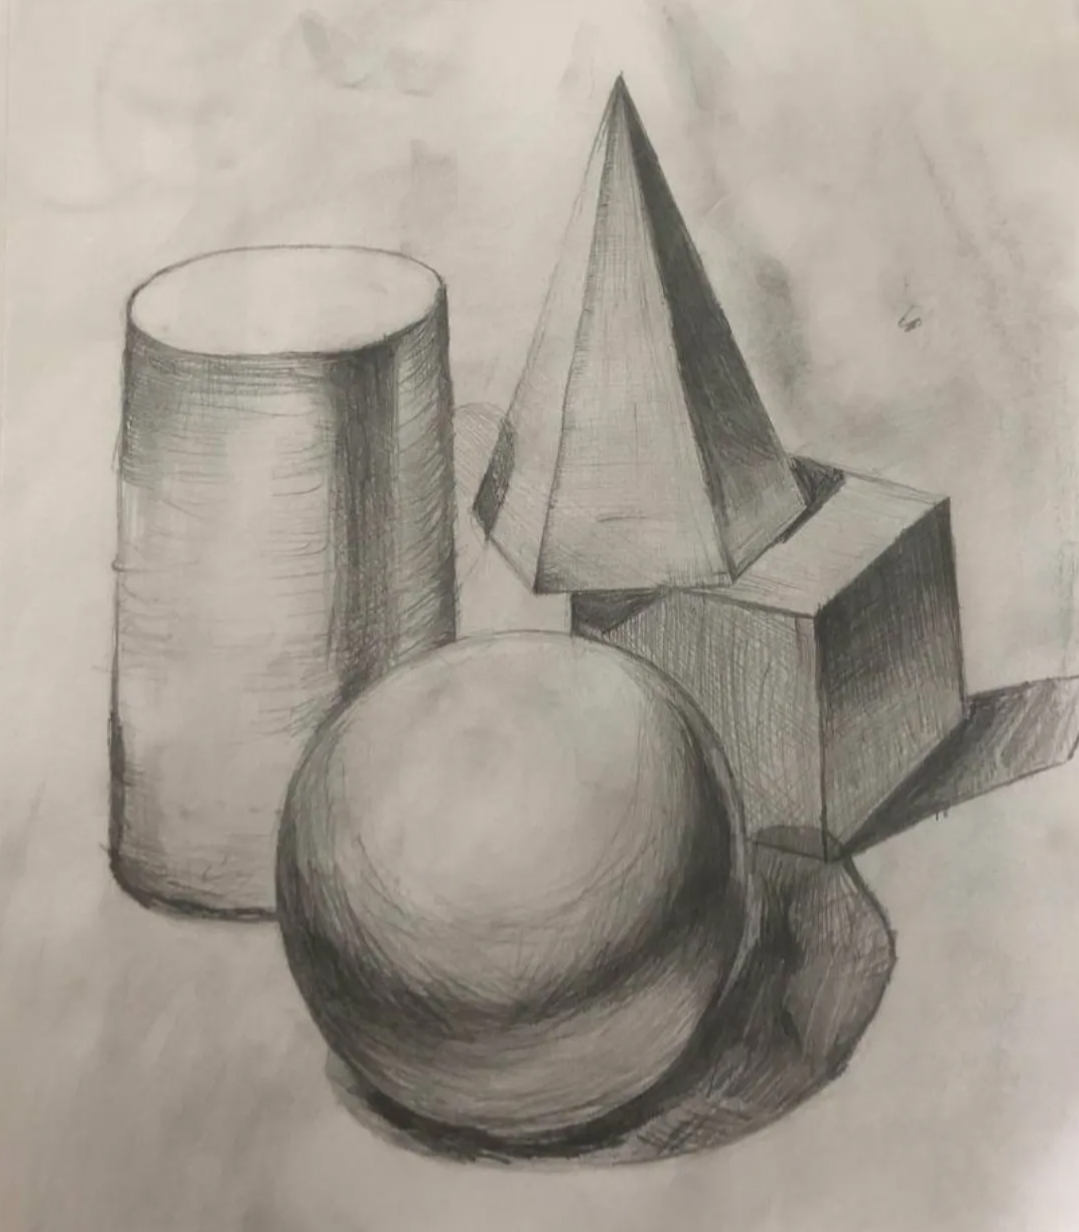
1- You can’t draw what you can’t understand. Before you actually start shading, study how light interacts with objects. Learn the basics like highlights, midtones, shadows, and cast shadows.
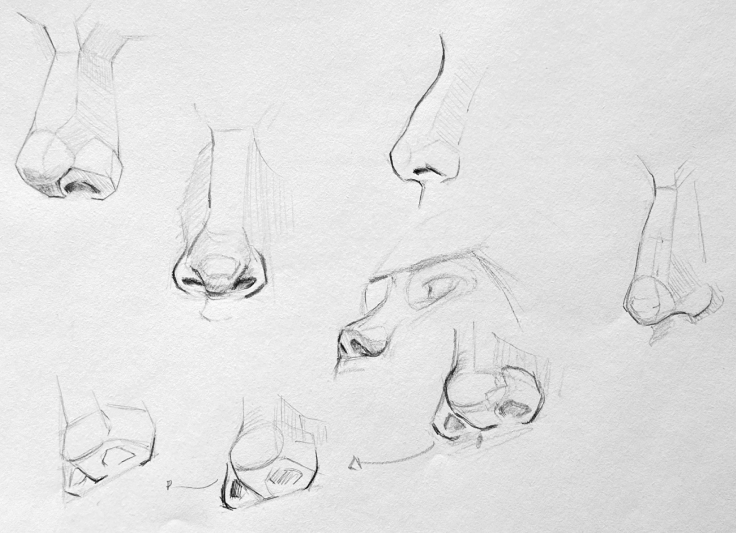
- 2- Next, avoid this common mistake: jumping straight into shading faces. At this stage, shading such a complex structure can be overwhelming. The good news? A face can be simplified into basic forms. Master shading these simple form first, and shading an entire face will feel much easier!
 Student example - Jessie
-
3- When you're ready you can move on to facial feature and shading a full face! Here the trick: always use a reference! Pick ones with clear lighting and strong contrast, and stick to a single light source. This will make learning faster and your results much more striking.
Mastering Step 2 will take your sketches from rough ideas to rendered portraits, with minimal material!
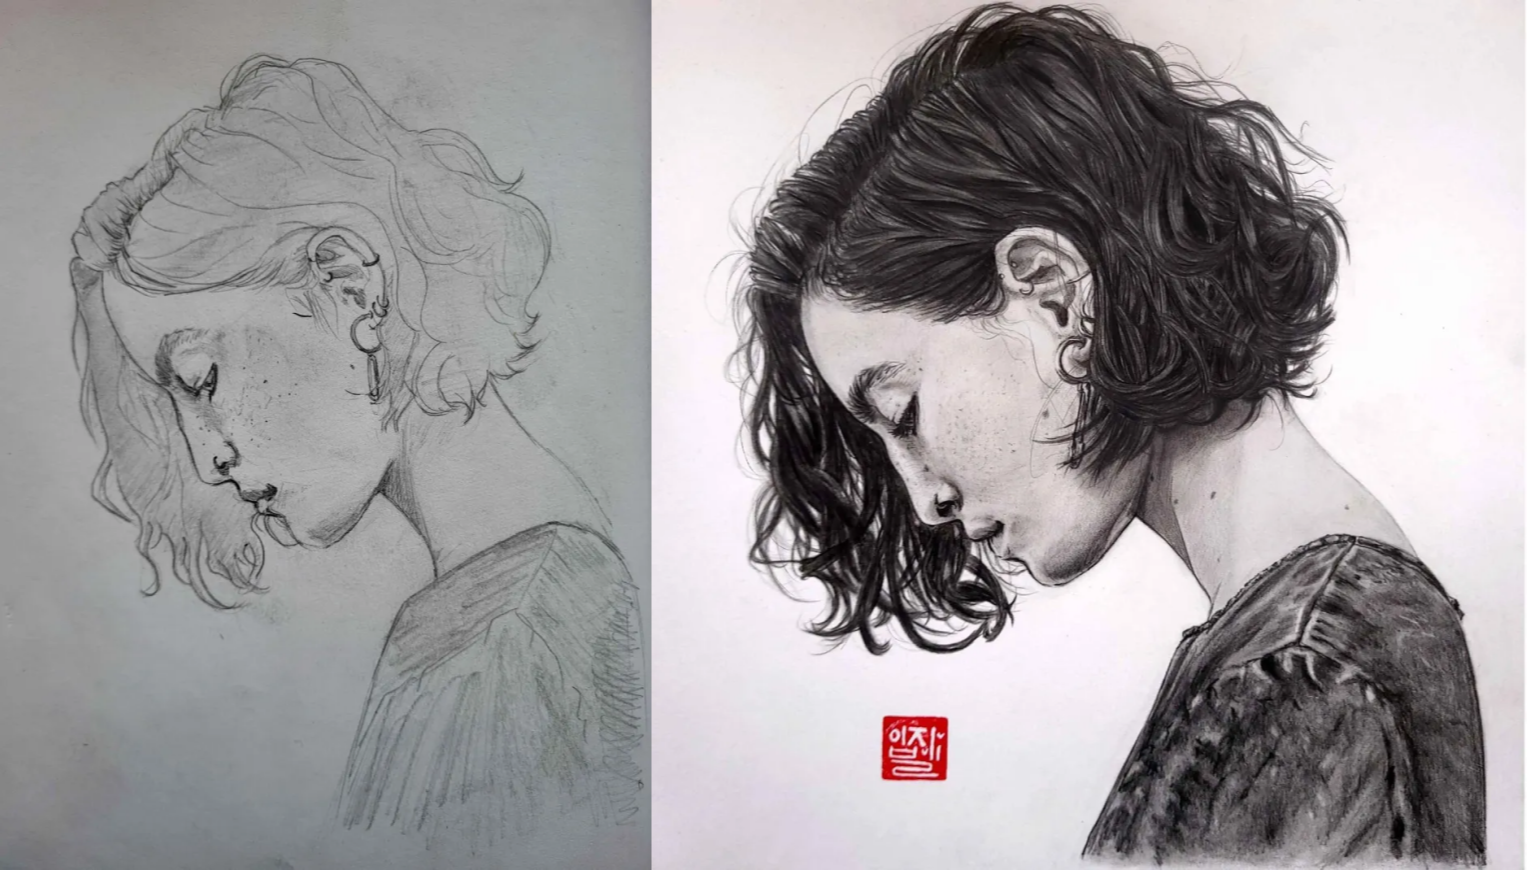
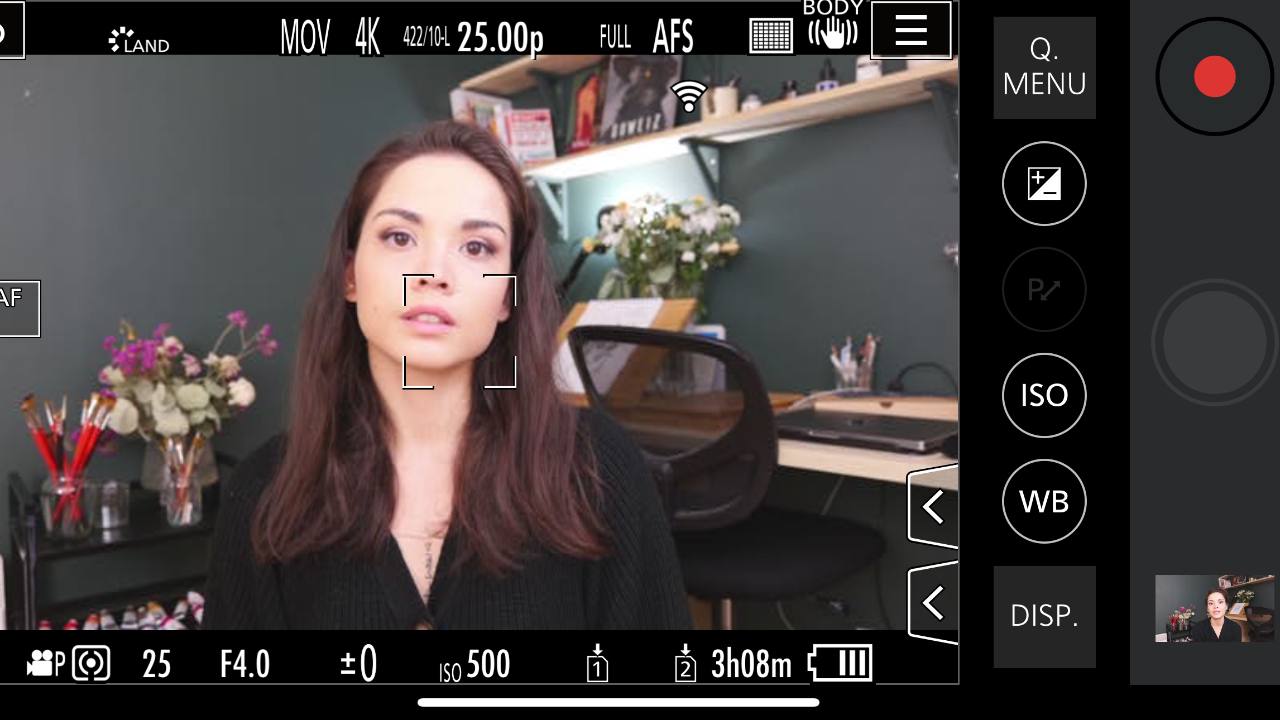
STEP 3: [Reality] Capturing life in your portrait
At this point in your learning, you already know how to draw and shade portraits.
But there are still two key ingredients missing to make art that’s truly yours. One of them is how alive your portrait feels.
You might not like what I’m about to say, but I’ll tell you anyway:
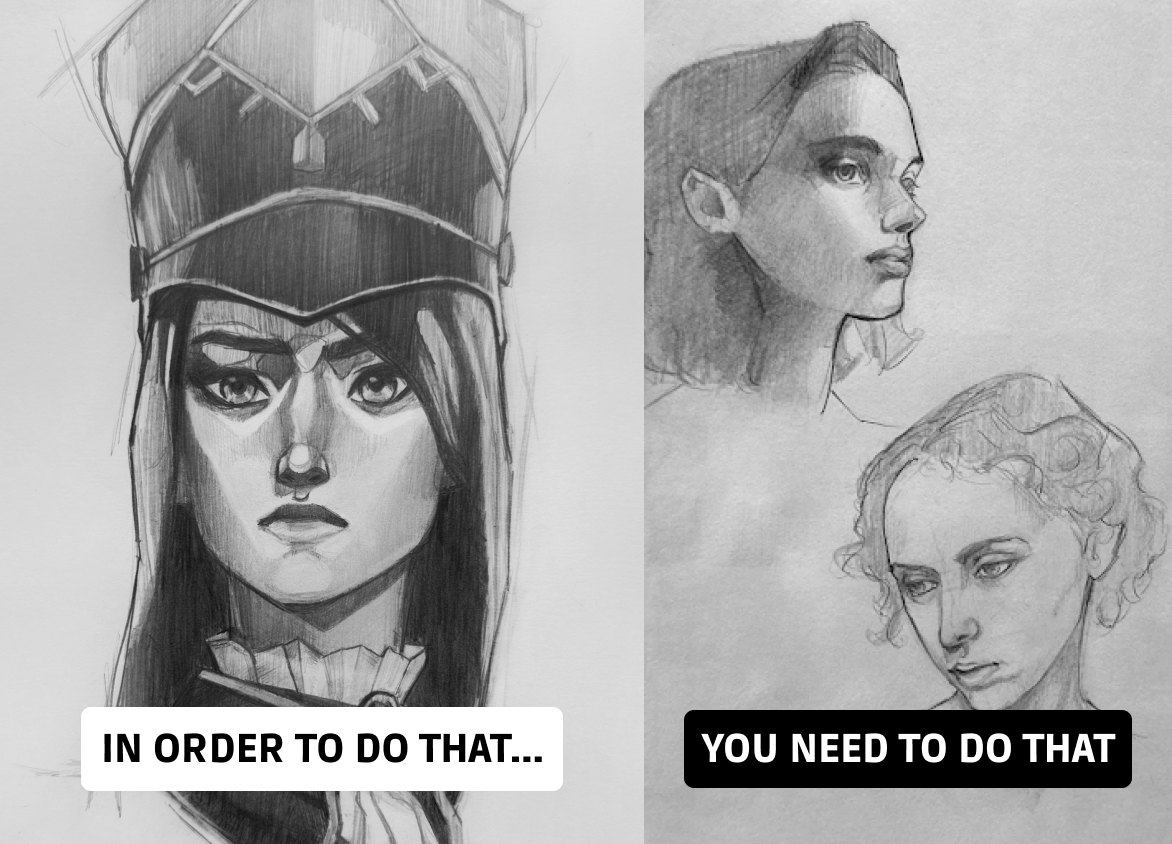
The most straightforward way I’ve found to bring life and quality to your stylized portraits is through practicing observational drawing.
1- Why real-life portraits?
Most of the time, artists get really good at drawing the right proportions and facial features, but their portraits end up looking stiff, dull, and not very lifelike.
Plus, they tend to draw the same face over and over.
To avoid these issues and make my portraits more lively, I found that drawing faces from real life was a game-changer.
Simply put, making your art look unique often means bending or breaking some of the rules of realism. But you can't do that and makes it looks good unless you first understand those rules.
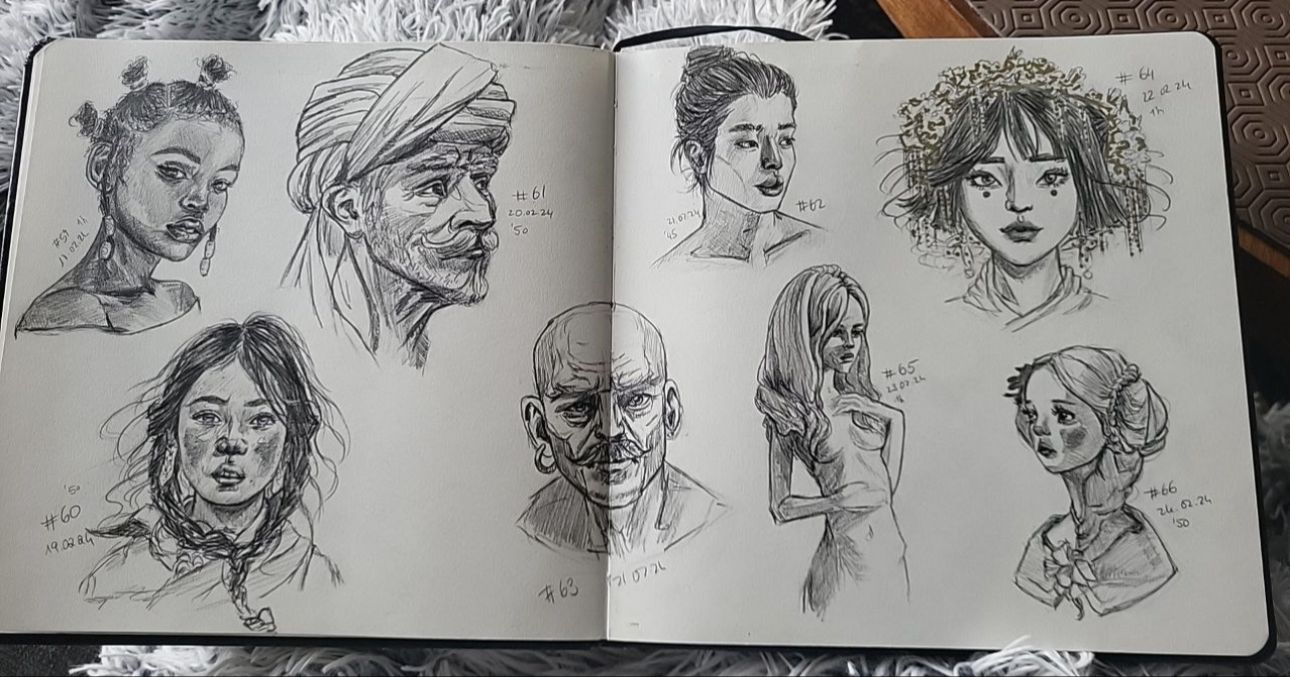
2- Observational practice made easy
Drawing portraits from observation can be challenging.
Personally, it was one of the most challenging aspects of my artistic journey. I was simply terrified at the thought of not being able to reproduce the face in front of me.
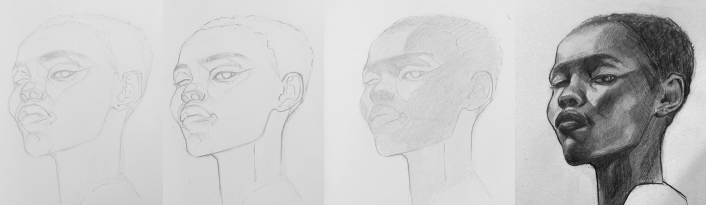
However, after months of trial and error, I came up with a simple 4-step process, which you can draw inspiration from:
These 4 steps help you take on any face and draw it from observation.
They allow you to tackle one aspect at a time and achieve impressive results in just a few steps.
-
Step 1: Outline. At the beginning, use basic shapes and straight lines. Focus on measuring every angle and distance to get correct proportions.
-
Step 2: Linework. Once you've measured the proportions, improve your lines by varying their thickness and darkness.
-
Step 3: Mass Blocking. Before delving into detailed rendering, separate the shadow areas from the light areas.
-
Step 4: Shading. Now, you're prepared to create contrast by adding multiple layers of shading and hatching!
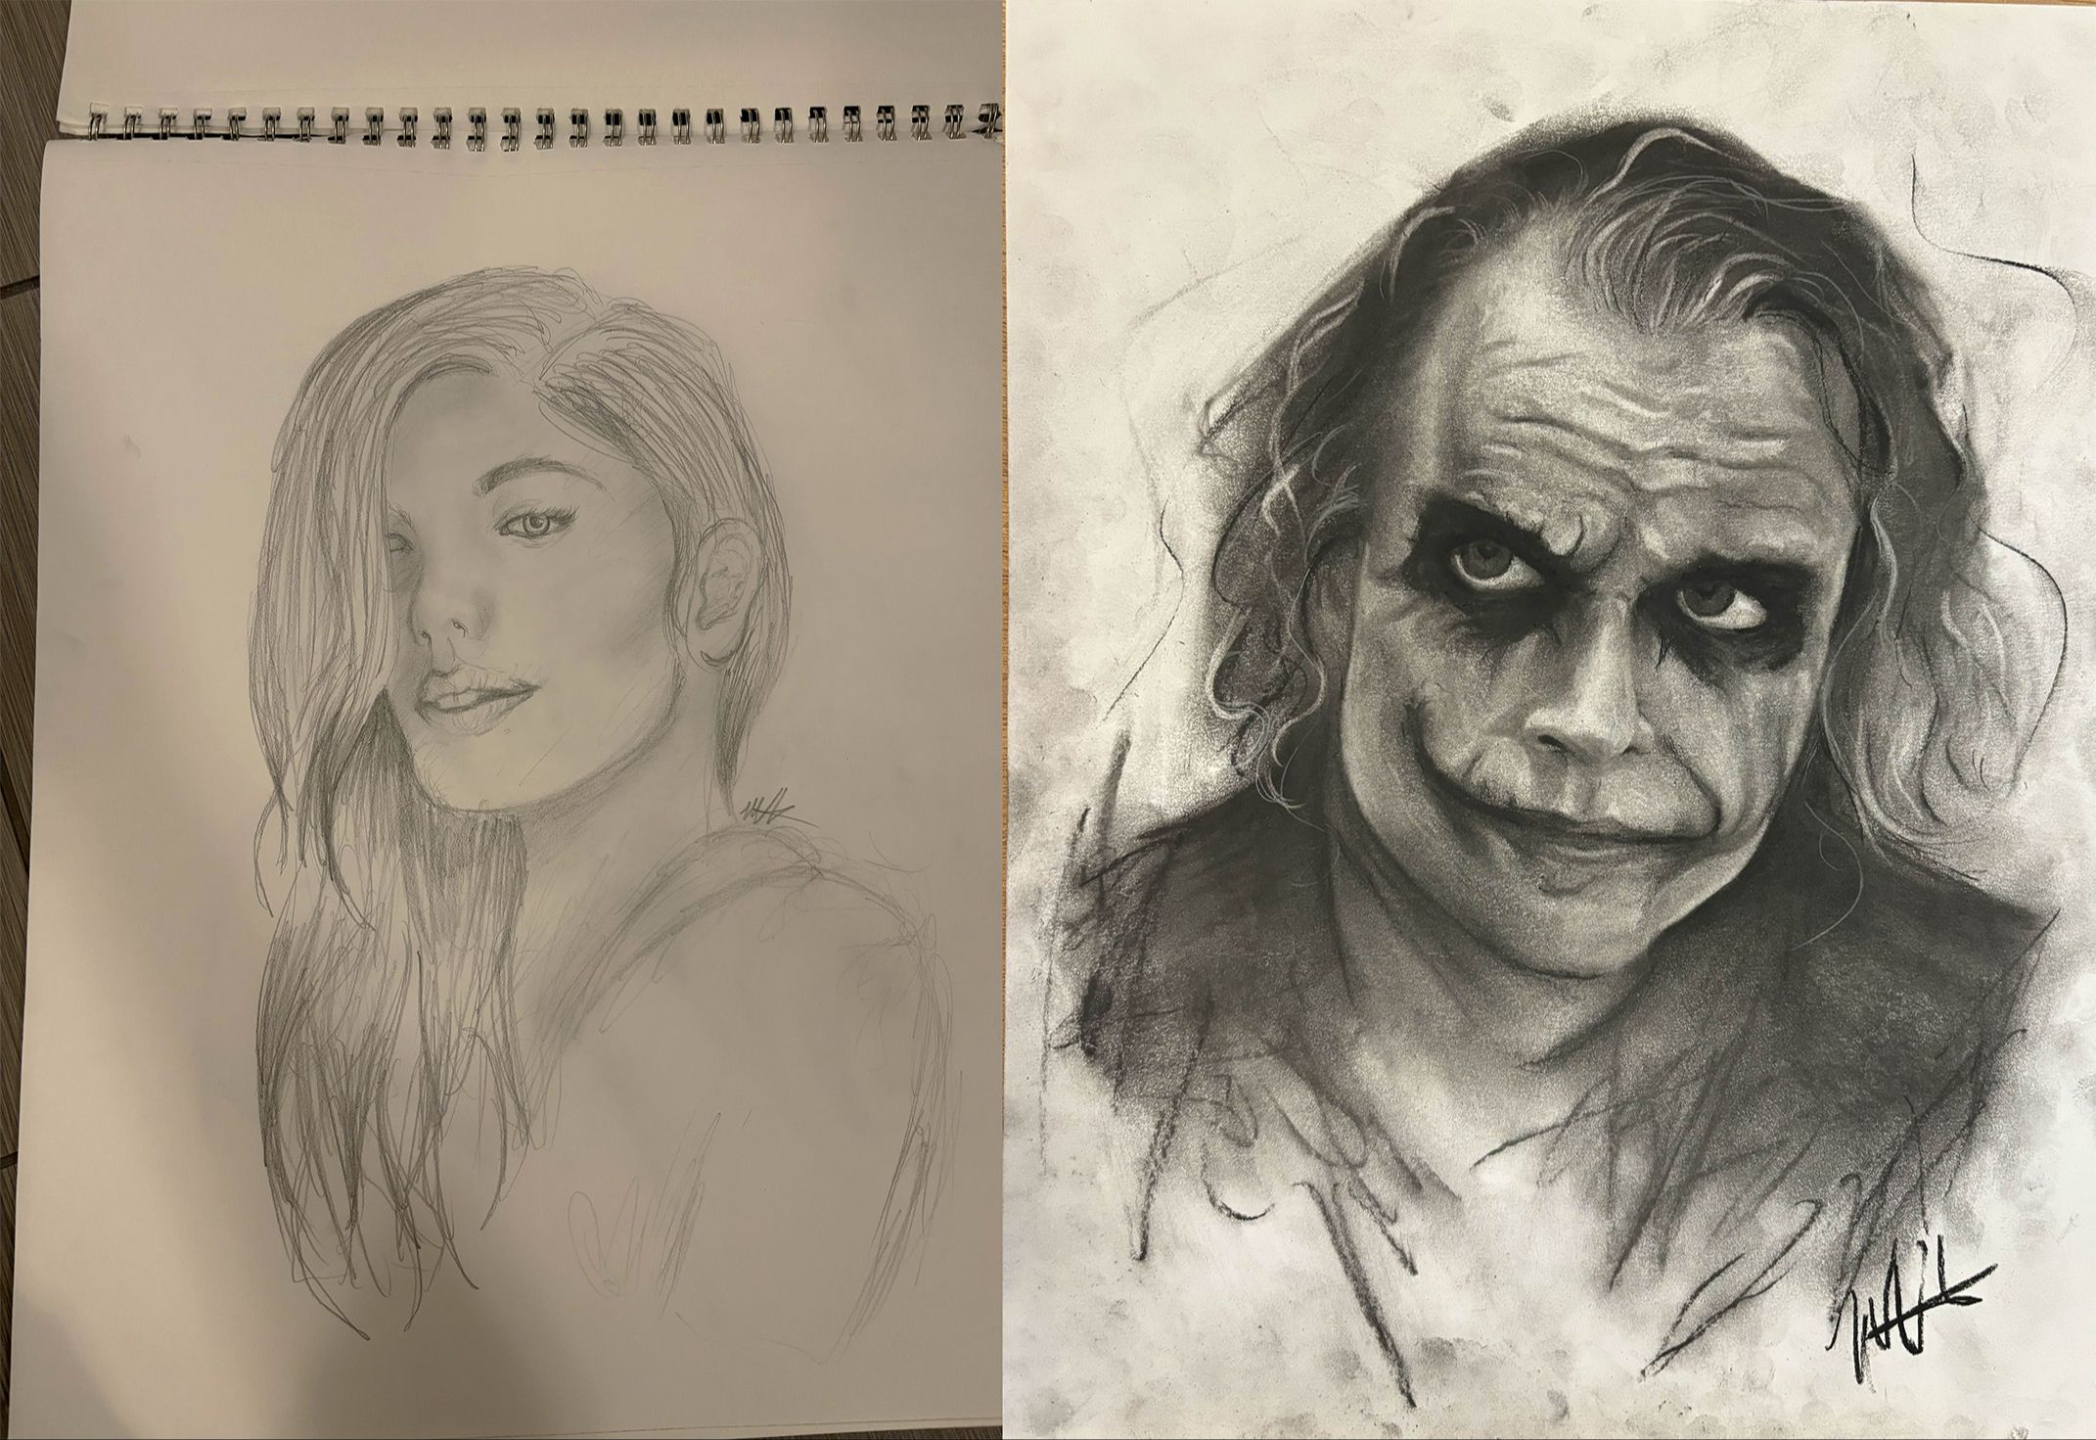
Student example - this is how Ash have improved since he joined my portrait course Reality to Fantasy
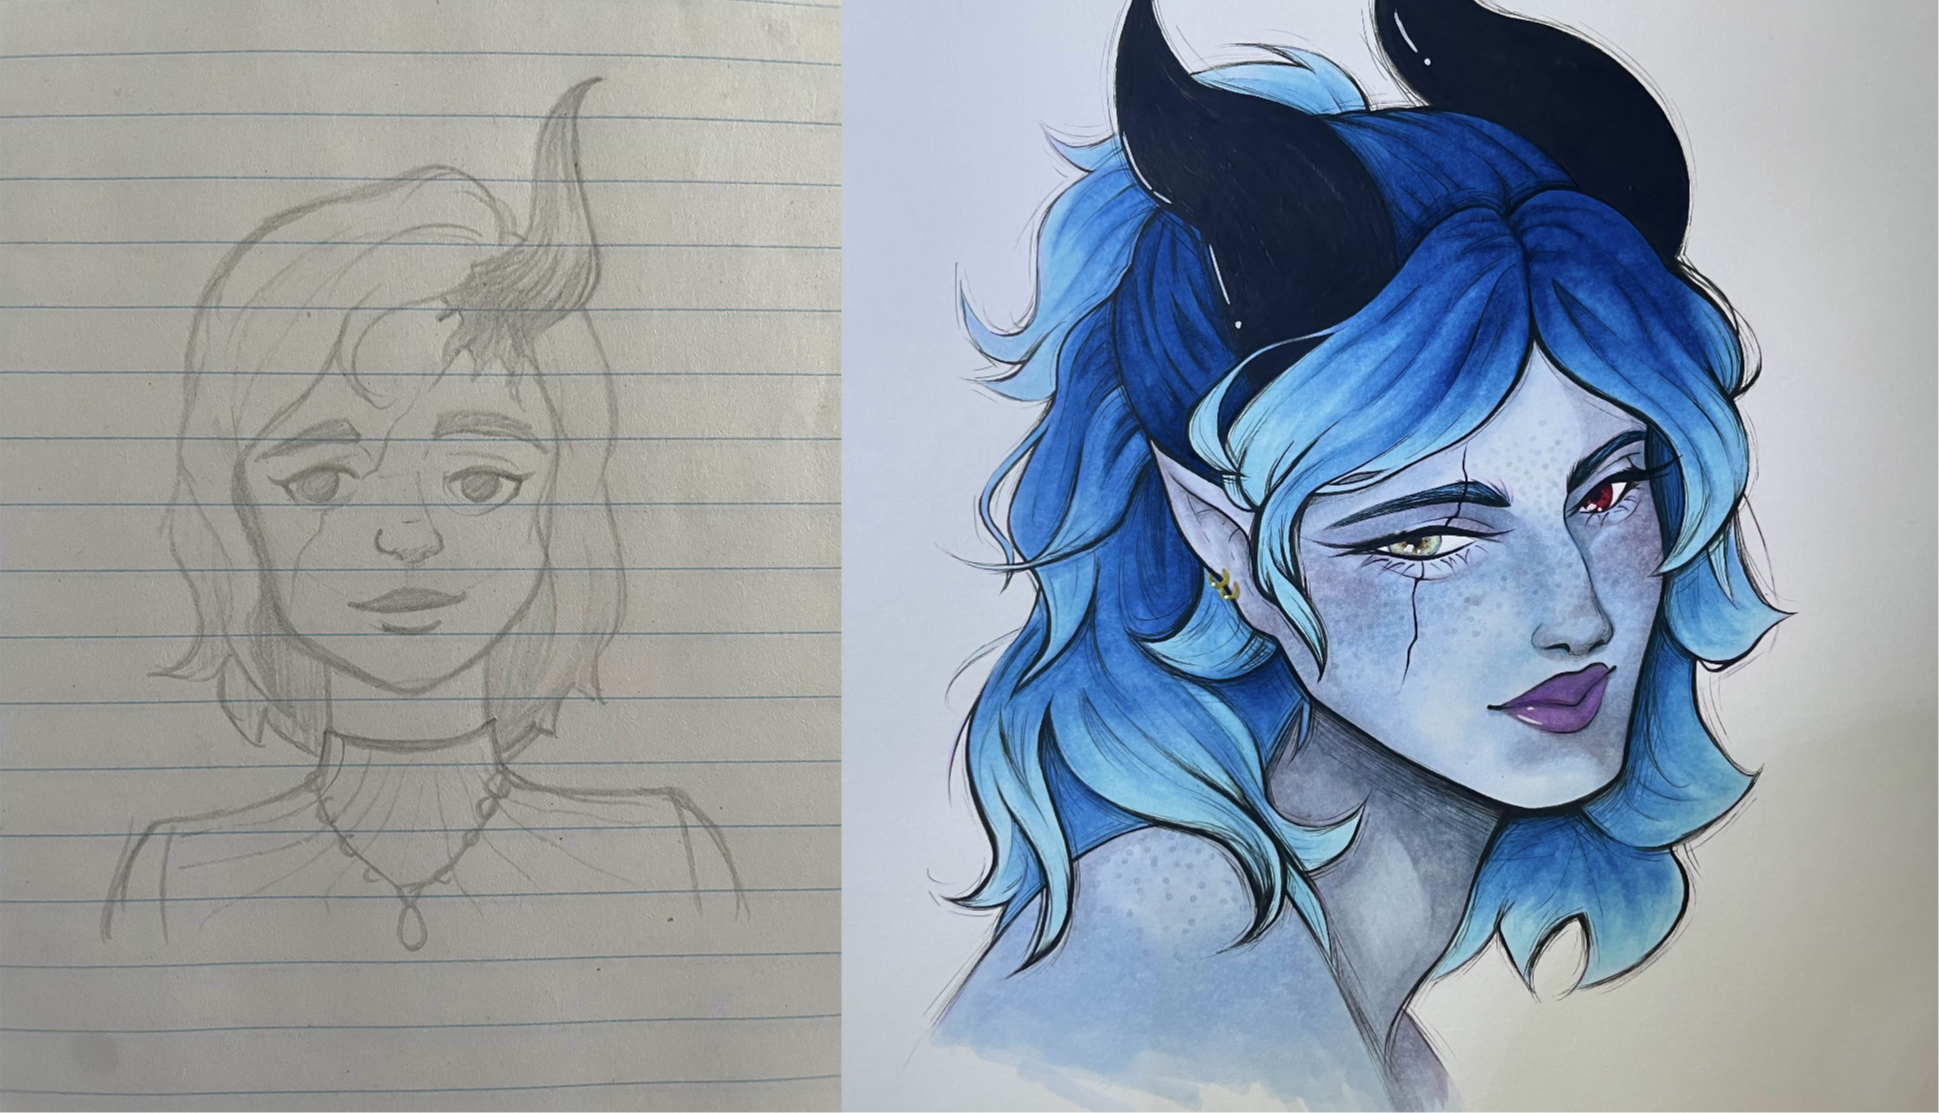
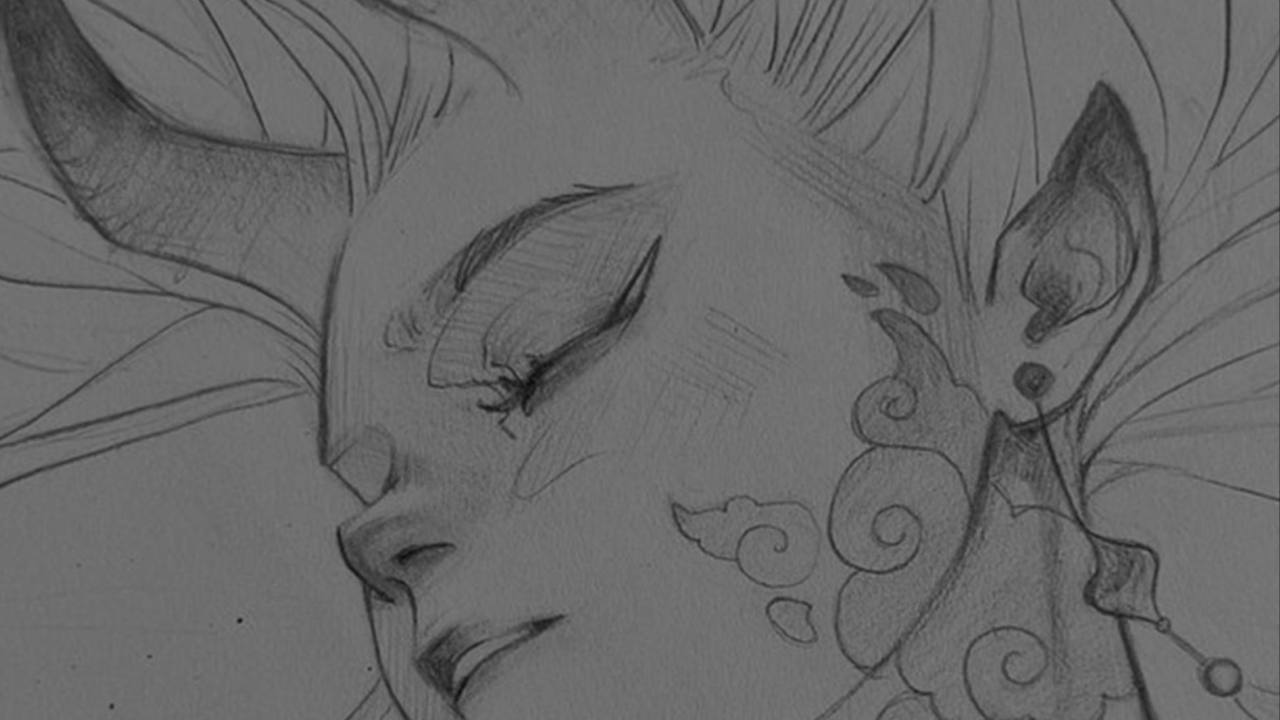
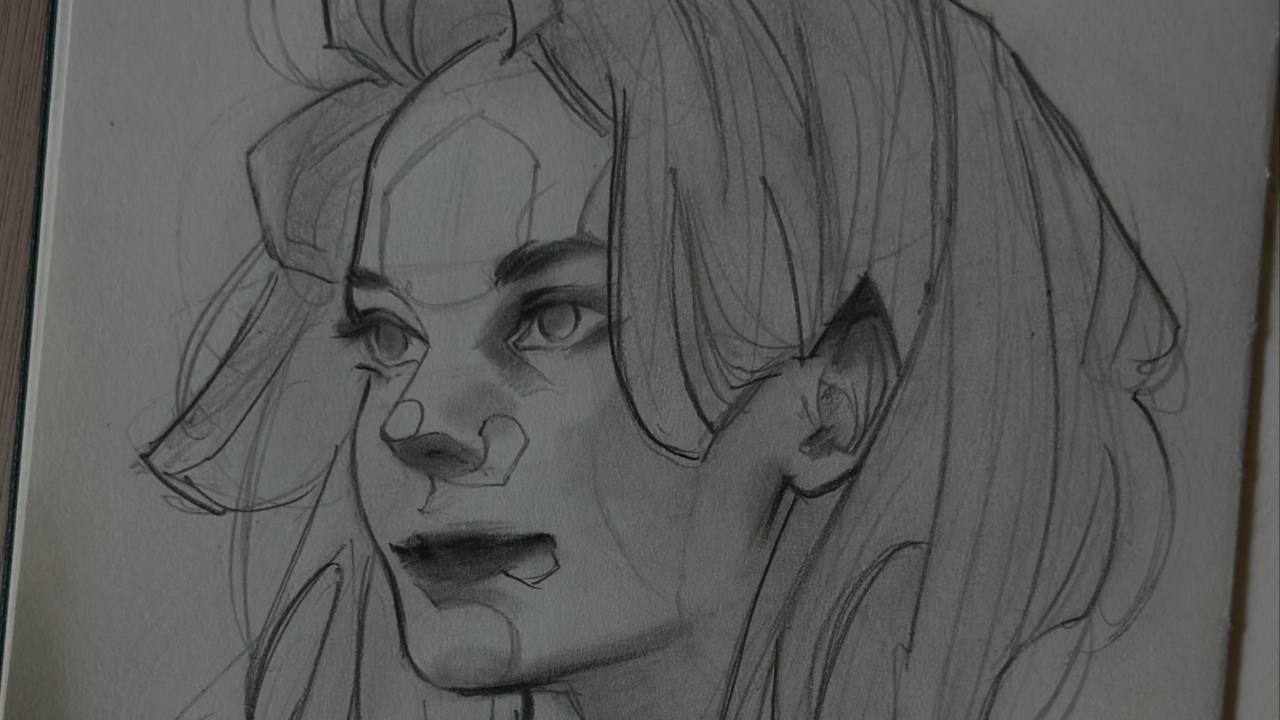
STEP 4: [Fantasy] Creating memorable characters
“Omg Léa… All of this before creating my own characters?!”
I know, it might seem like a lot. But you actually only have 2 choices:
Choice 1: You skip some steps and end up with stylized portraits that aren't very accurate or attractive.
Choice 2: You trust the process, complete all the previous steps, and finally, you're ready for the best part: turning reality into fantasy!
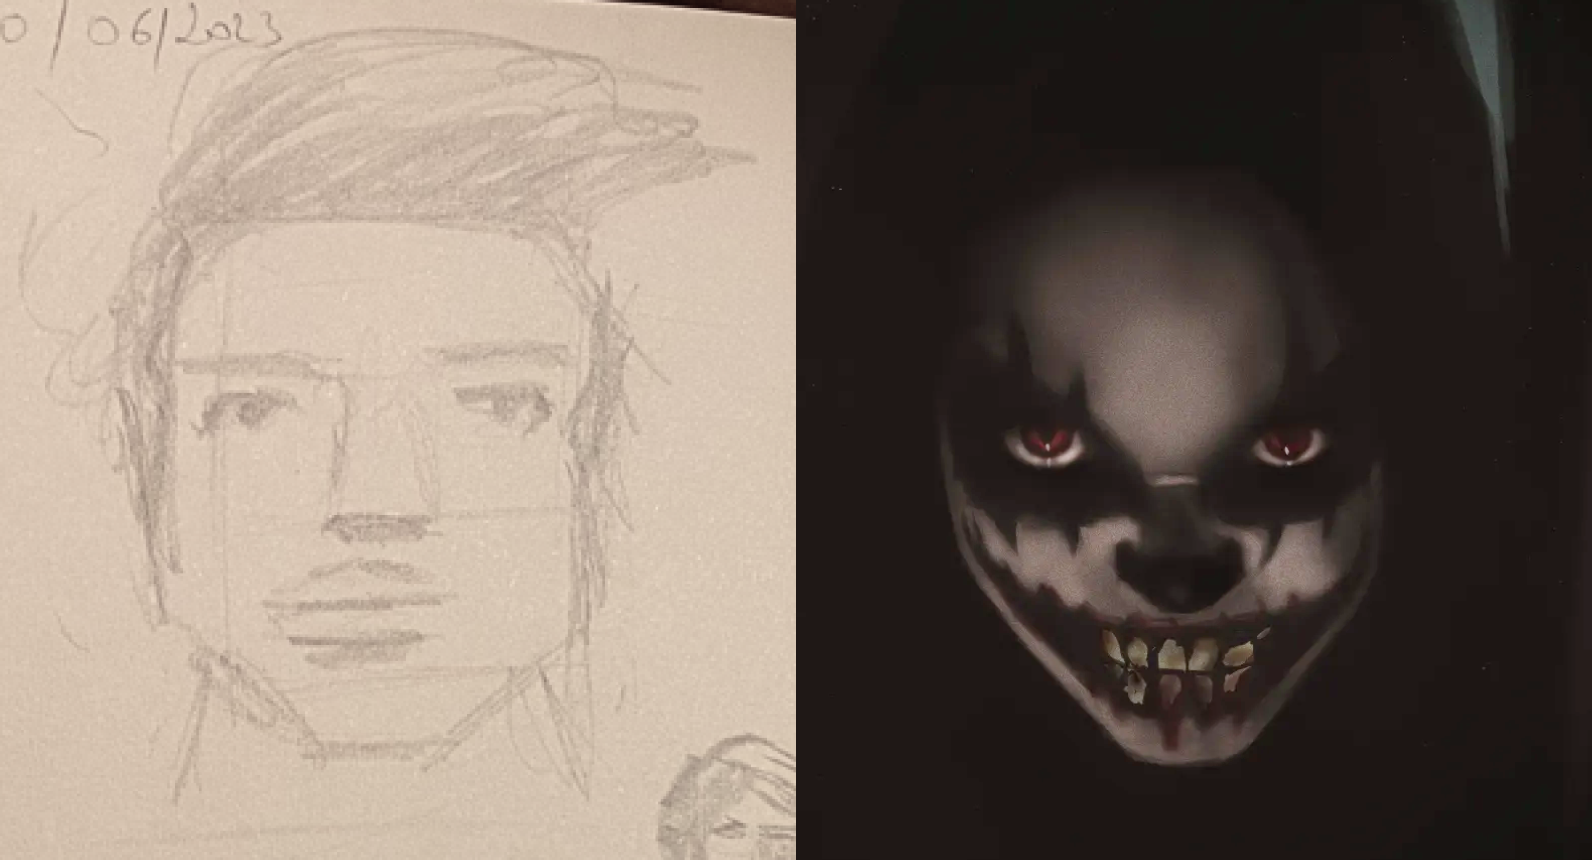
Student example - this is how Tiny have improved since he joined my portrait course Reality to Fantasy
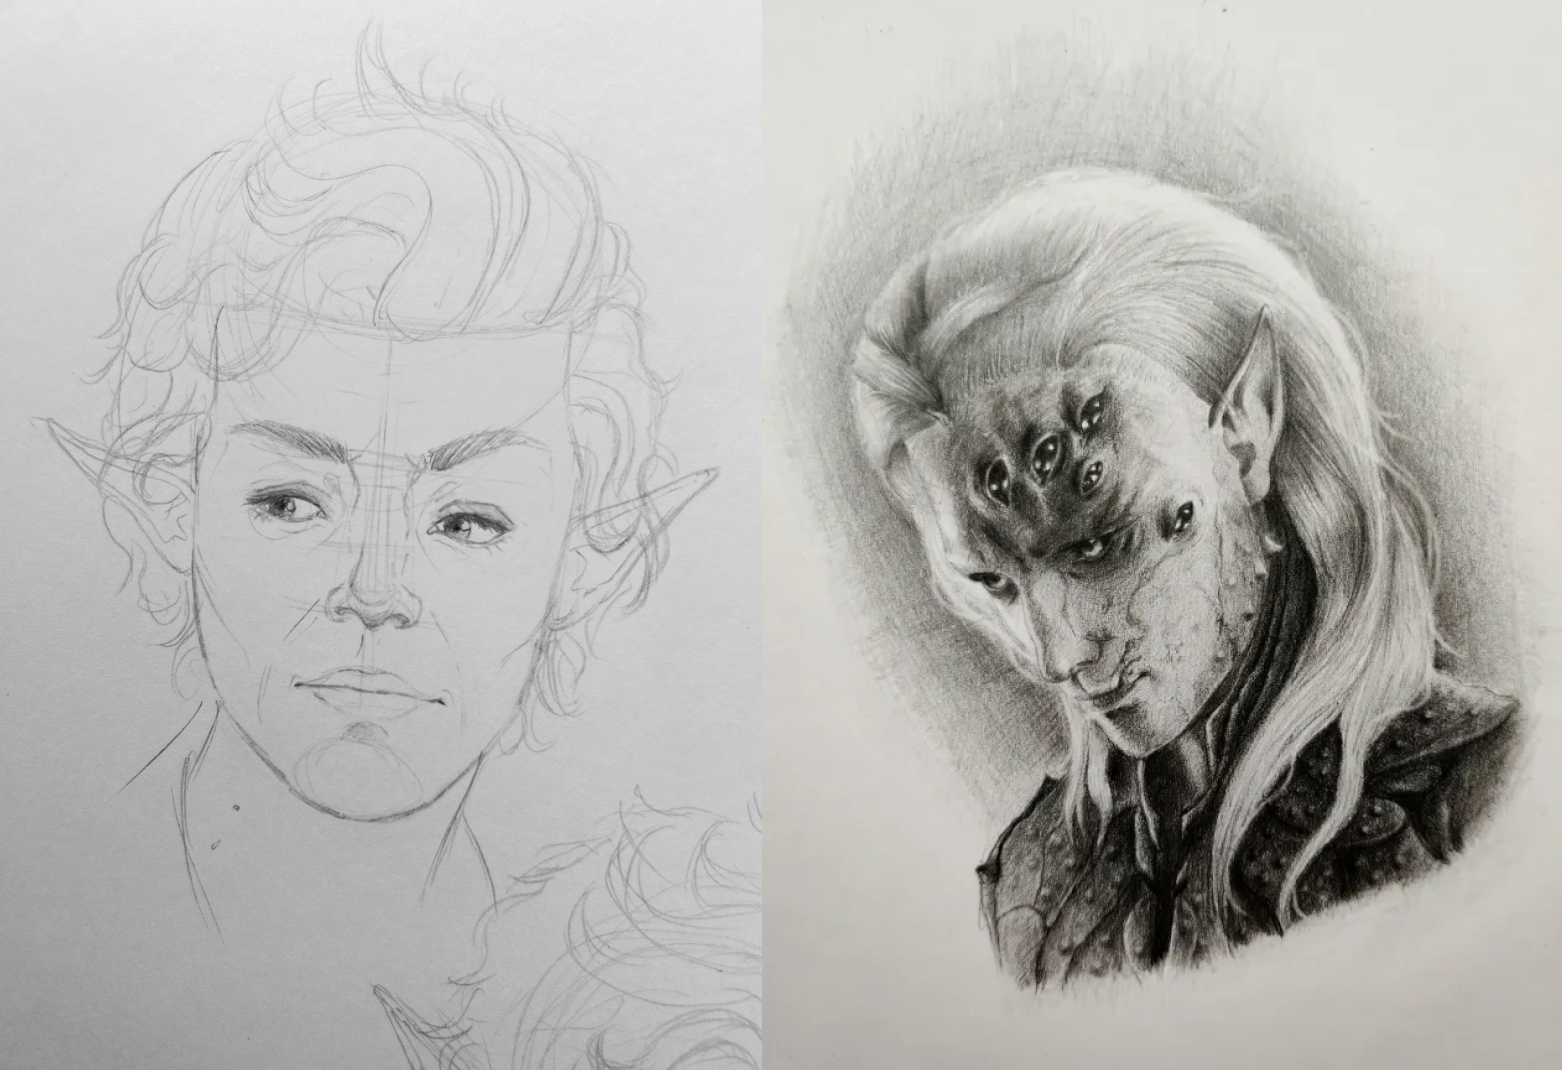
Student example - this is how Renni have improved since he joined my portrait course Reality to Fantasy
1- The Myth of Inspiration.
I used to think that artists I admired came up with their ideas on their own, that they were the kind of people who had a thousand ideas per hour.
But one day, I came across a quote from the artist Chuck Close that changed my perspective:
"The advice I like to give young artists, or really anybody who'll listen to me, is not to wait around for inspiration. Inspiration is for amateurs; the rest of us just show up and get to work."
This quote sums up the creative process perfectly:
Creating unique portraits does not rely on inspiration or talent. It's all about implementing good habits to generate ideas.
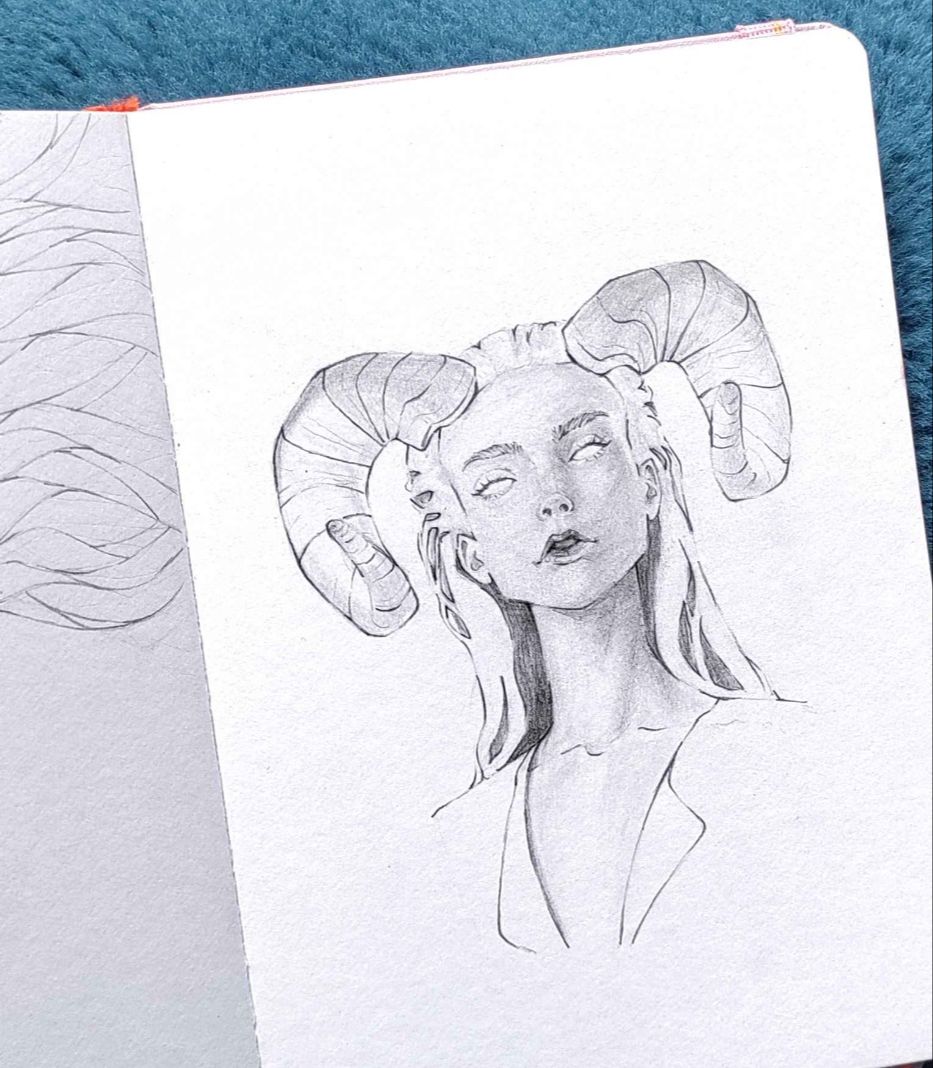
2- Set up an efficient process
Now, you realize that anyone can find their own style and create characters like this:

All you need is an efficient and replicable creative process.
Such a process typically consists of three main stages:
-
STEP 1: Planning. First, you create a story and concept for your character.
-
STEP 2: Composition. Next, you transform your concept into visual elements, designing your unique character. During this stage, you can experiment with various drafts to develop your own style.
-
STEP 3: Creation. Once you're ready, you can begin drawing your final artwork!
But you can break down this process even further. In my portrait course, Reality to Fantasy, here's the comprehensive process I teach my students:
-
STEP 1: How to create a memorable backstory for your character using specific constraints.
-
STEP 2: How to deal with references and find some that support your backstory and generate more ideas.
-
STEP 3: How to translate your story into visual elements by using shape language and character design.
-
STEP 4: How to use iterations and thumbnails to enhance the narrative of your portrait and experiment with your unique art style.
-
STEP 5: Starting the creation process without panicking and infusing your personal style into the outline.
-
STEP 6: Exploring the secrets of linework and line variation.
-
STEP 7: Separating light and shadow to create a compelling light composition that tells a story.
-
STEP 8: Achieving stunning stylized rendering through hatching techniques.
5/ How long does it take to get to this point?
I know, all these steps may seem overwhelming. But now, you have a clear roadmap, and you know what you need to do!
Now, you have two options:
1- Option 1: Do this on your own.
I’ll be honest with you—learning all of this as a self-taught artist is absolutely possible. Here’s what it involves:
- STEP 1: Take each step in this email and create an educational plan.
- STEP 2: For each step, gather free resources from YouTube, blogs, or your favorite artists.
- STEP 3: Find a mentor or a supportive community to review your work, give feedback, and motivate you when things get tough.
- STEP 4: Build discipline on your own to complete each of the steps, self-correct, and stay motivated.
This is how I did it. But let me warn you: it’s time-consuming, frustrating, and lonely.
You’ll hit roadblocks and ask yourself questions like:
- Where do I find the right tutorials?
- Am I practicing the right way?
- How do I know what’s working or where I need to improve?
For me, it took three years of trial and error to figure it all out.
That’s why, I created a second option.
2- Option 2: Cheat the process
For those who want to reach their goals in months instead of years, I’ve created a cheat code.
It’s not mandatory, but it will save you time, frustration, and ensure you’re on the right path.
This option is Reality to Fantasy: my step-by-step video series that guides you through the entire process.
👉 For every skill we covered today, you’ll find in-depth videos where I demonstrate exactly how I do it.
👉 You’ll get my tips, corrected exercises, and the structure you need to make real progress.
👉 You can’t fail because I’m drawing with you. And if you get stuck or want personal feedback, you can simply join the student Discord and ask me, my mods, or other students for a review!
In short, it’s a proven, no-stress roadmap—tested by over 550 students—to help you avoid the guesswork of learning alone.
🎊🎂 And you’re in luck: Reality to Fantasy turns 1 year old today! 🎂🎊
To celebrate, the course is reopening for just 3 days, with a special Black Friday offer.
But don’t wait—doors close this Sunday, and I don’t know when they’ll open again.
This is the perfect chance for me to work with highly motivated students—and for you to set yourself up for a successful portrait journey.
If you’re ready to cheat your way to creating impactful, stylized portraits, this is your moment!
👉 Join the course now at a Black Friday price (closed)
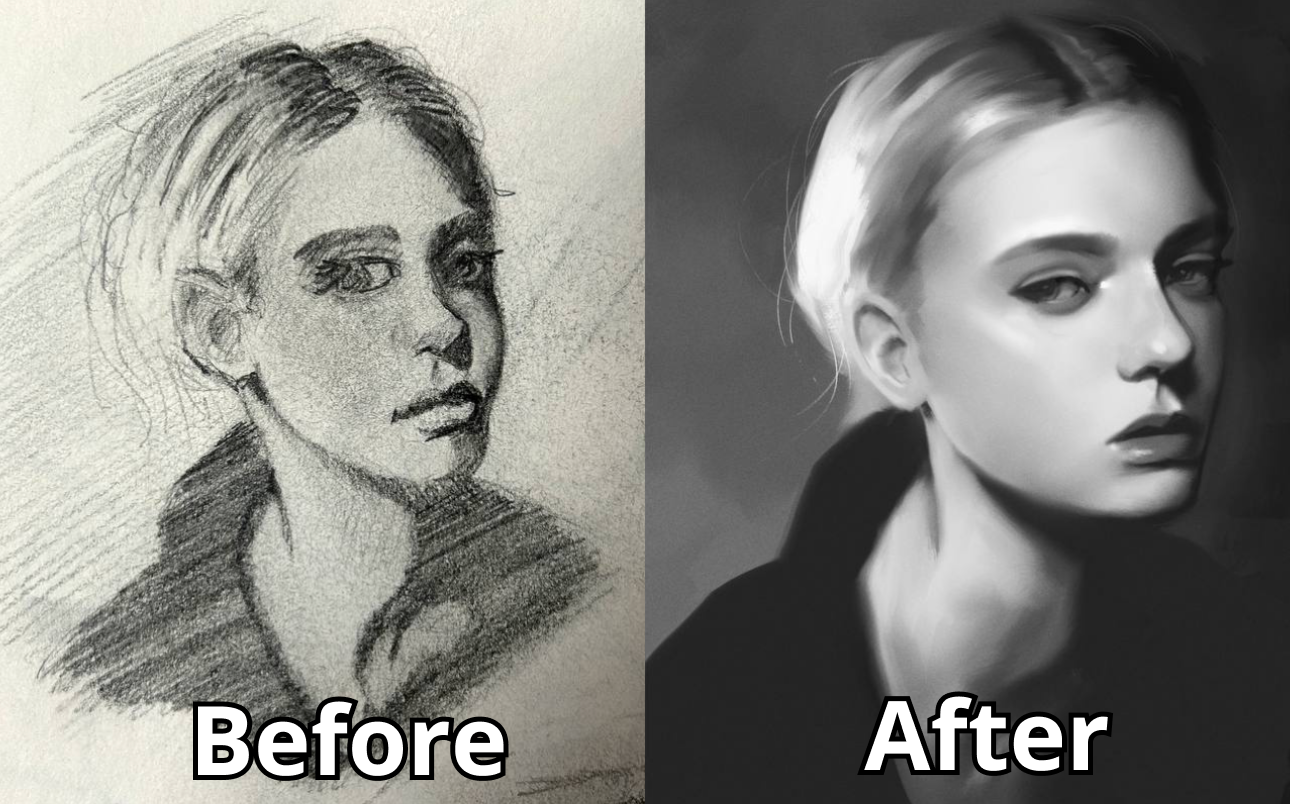
Student before/after - Maddy
Student before/after - Kyoma85
Student before/after - Riisa
Student before/after - Bun
Student drawing - Somnya
Student drawing - Isabel
Student drawing - Mina
👉 Join the course now at a Black Friday price (closed)
Responses